


Method 1: Instagram gallery
Build a fully responsive Instagram gallery in 5 steps.
Use Zapier to connect your Instagram feed to a fully responsive, custom layout with CSS grid.
In this lesson:
- Create a Collection (a simple database in Webflow)
- Create a Zap (to connect Instagram to your Collection)
- Design the Collection list
- Customize the look and feel
Good to know: This grid will add new Instagram posts to your layout, but it won’t grab all existing photos.
Create a simple Collection
(a simple database in Webflow)
In the left toolbar, choose CMS Collections and click the blue button to add your Collection (create the database).
Go ahead and name your collection, e.g., "Instagram feed."
Now:
- Click Add new field next to Collection fields
- Choose Image when prompted to Select field type
- Name the Label (e.g., “Images”)
- Click Save
- Click Create Collection back at the top
Okay, that's step one. Next: Zapier.
Create a Zap
(to connect Instagram to your Collection)
Zapier has a basic format: when this happens … do this. A trigger event and a result.
When new images are posted to your Instagram account, you want this Zap (this whole process) to activate. Let’s make that happen!
In your Zapier account, for the first step, When this happens ...:
- Select Instagram under Choose App & Event
- Select New Media Posted in My Account from the dropdown for Choose Trigger Event
- Click Continue and enter your Instagram account information
Once you connect your account, you can Test and Continue.
And now for the second step (the result), Do this …, you’ll connect the first step to Webflow:
- Select Webflow under Choose App & Event
- Select Create Live Item from the dropdown under Choose Action Event
- Click Continue
- Choose your Webflow account under Choose Account
- Click Continue
- Choose Photostories for your Site under Customize Item
- Choose Instagram feeds under Collection to link it to the database we created earlier
- Choose Standard Resolution URL under Images to bring in new images posted to Instagram
- Set the Name to grab the caption text
- Set both Archived and Draft to No (for now)
- Click Continue
Now click Test and continue again and you’re ready to activate your Zap.
In the top right, verify your Zap is switched to ON.
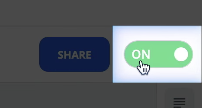
In the next step, you’ll design your Collection list.
Design the Collection list
Before you launch into this step, you may want to post a new image or two to your Instagram account to trigger Instagram to pass new photos to your grid.
In this step, you’ll build your Collection list. A Collection list is a list of items from your Collection — the database you created earlier.
In the Webflow Designer, click the plus sign in the left toolbar and under CMS, drag a Collection list onto your canvas where you’d like it to sit.
In the Collection list setting popup, choose Instagram feeds as the Source. This immediately populates your Collection list wrapper with an entry for every new image you uploaded to Instagram at the beginning of this step.
Note: Images can take time to show up. Refresh your project in Webflow if you don’t see updates right away.
At this stage, there’s no images or layout for your Collection list wrapper. There are 2 different ways to fix this:
- Add an Image element into your Collection list wrapper
- Create a grid layout for your images that open into a lightbox
Let's start with the quickest way.
Add an image to your Collection List
- Click the Add Elements icon (the plus sign) in the left sidebar
- Scroll down in the Add panel to the Media section
- Drag in an Image element into any of the items in our collection
- Check the box labeled “Get Images from <collection></collection>”
- Open the dropdown and choose the collection field you want to get content from
Create a grid layout for your images that open in a lightbox
The other option is to create a grid layout and add a lightbox element for the gallery.
To create a grid layout:
- Choose your Collection list from the Navigator on the left
- Change the display setting in the Style panel to Grid.
- Edit your grid to fit your project.
Learn more about Grid layouts in Webflow.
Okay. That's our grid layout. Now, our layout looks great as is, but let’s make it so that when you click the image, it shows up in a lightbox.
To add an image lightbox:
- Delete the previously added image (you’ll replace it later)
- Drag a lightbox from the Add panel into any of your Collection items
- Click the placeholder image inside the lightbox
- Check the Get image from checkbox in the Image Settings and
- Pick the relevant Collection image field from the dropdown
- Check the Get Media from checkbox in the Image Settings
- Pick the relevant image field from the dropdown.
- Under Lightbox Settings, check link with other lightboxes
- Give the lightbox group a name (e.g., Instagram).
To publish your project: click the Publish dropdown and choose Publish to Selected Domains. Now when you visit your live site, you can click the images to see and click through them in a lightbox.
Customize the look and feel
Here’s where you can style your grid to give it a custom look with a frame for your pictures.
You can do this in 2 steps:
- Create a frame
- Style the frame
Create a frame
- Drag a Div Block inside the Lightbox Link
- Give the Div Block a class name, like Frame
- Drag the previously added Image element into the Div Block as a child (we want the image inside the frame)
Style the frame
- Select the Frame Div block element on the canvas
- In the Style settings of your Div block, scroll down to add a solid border on all sides and set a border width.
- Hold Shift and drag to add space inside your frame with padding (the space inside an element)
- Set your Display setting on the frame to flex
- Use flexbox to align and justify the image inside the frame to center (flexbox lets you set the parent element layout properties that control its child elements. Learn more about centering elements with Flexbox in Webflow)
Now you can add realism to your framed photos with a shadow: With your frame still selected, scroll down in the Style Settings to Effects, and click the + icon next to Box shadows.
Learn more about box shadows in Webflow.
Don't forget to publish your project — click the Publish dropdown and Publish to selected domains.
Tweak your grid to best fit each breakpoint. Learn more about how to turn a collection list into a responsive grid in Webflow. When you click into any of the images on the live site — you should see the full gallery! You can switch between each of your Instagram photos and new posts will be added automatically.
Amazing work!


